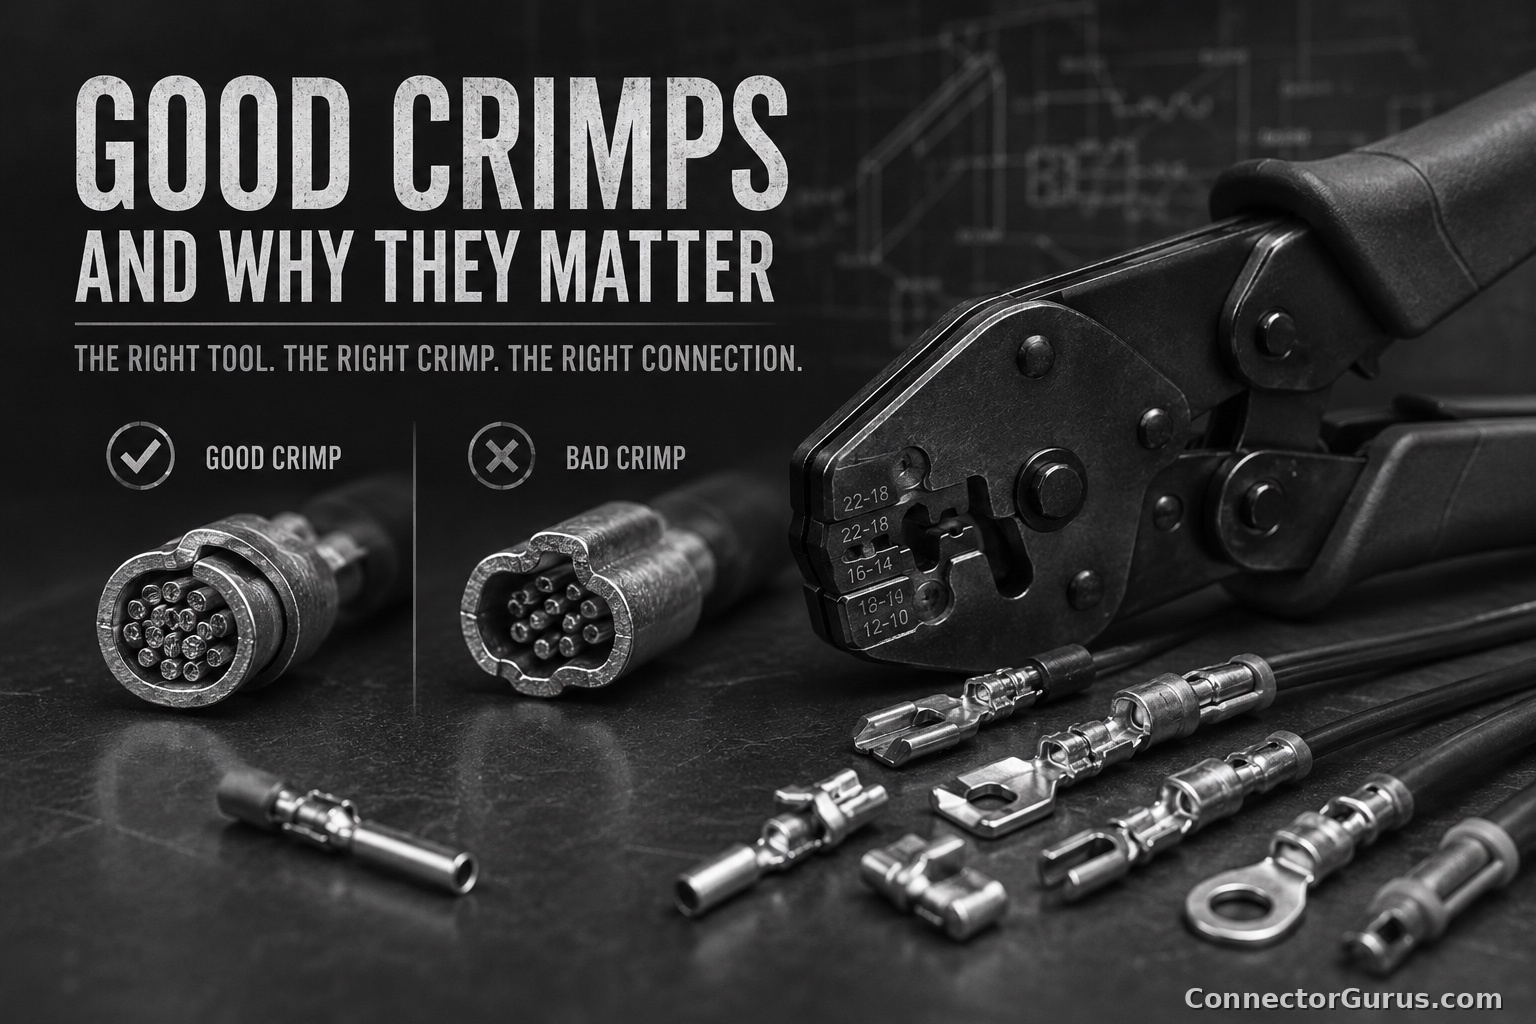
Good Crimps and Why They Matter
Good Crimps and Why They Matter
Crimping is one of those things that looks simple until it causes a problem.
On the surface, it seems easy enough. Strip the wire, put it into a terminal or contact, squeeze it, and move on. The problem is that a crimp is not just a squeezed piece of metal around a wire. A proper crimp is a controlled mechanical and electrical connection.
When it is done correctly, it can be very reliable. When it is done poorly, it can create one of the most frustrating problems in electrical and electronic assemblies: a connection that works today, passes a quick test, and fails later when vibration, heat, movement, or load exposes the weakness.
That is why good crimps matter.
What Is a Good Crimp?
A good crimp is a connection where the terminal, contact, or splice has been compressed around the conductor using the correct tooling, correct die, correct wire size, and correct strip length.
The goal is to create a strong mechanical connection and a low-resistance electrical path between the wire and the contact.
A good crimp should hold the wire securely, maintain proper contact with the conductor strands, and perform reliably over the life of the product.
It should not depend on luck, extra squeezing, guessing, or “that feels tight enough.”
Why the Correct Tool Matters
Every crimp contact is designed around a specific crimp geometry. The manufacturer designs the contact, barrel, insulation support, and crimp area to be formed a certain way.
That is why connector manufacturers specify approved hand tools, applicators, dies, or automated crimp equipment.
The correct tool does more than flatten the terminal. It forms the metal around the wire in the right shape, with the right compression, in the right location.
A pair of pliers cannot do that consistently.
Pliers may make the terminal look tight, but they do not create the controlled crimp profile the contact was designed for. The connection may feel secure at first, but that does not mean it is electrically or mechanically correct.
Why Pliers Are Not a Crimp Tool
Pliers are useful for many things, but making a reliable production-quality crimp is not one of them.
When you use pliers, the pressure is uncontrolled. The shape is uncontrolled. The compression is uncontrolled. The result depends on hand strength, angle, feel, and guesswork.
That creates risk.
A crimp made with pliers can be under-crimped, over-crimped, uneven, damaged, or misaligned. It may crush the conductor strands, deform the contact, weaken the terminal, or fail to make enough contact with the wire.
Worst of all, it may still appear to work during a quick test.
That is what makes bad crimps dangerous. They can hide.
What Can Go Wrong With a Poor Crimp?
A poor crimp can create several problems, and many of them do not show up immediately.
High Contact Resistance
If the wire and contact are not properly compressed together, the electrical connection can have higher resistance than intended.
That can cause voltage drop, signal issues, heat buildup, or unreliable performance. In low-voltage or low-current applications, even a small resistance problem can matter.
Intermittent Connections
A weak crimp may work when the assembly is sitting still, but fail when it is moved, pulled, vibrated, heated, or cooled.
This can create intermittent problems that are very hard to troubleshoot. The equipment may work one minute, fail the next, and then start working again after someone touches the cable.
Wire Pullout
If the crimp does not properly grip the conductor, the wire can pull out of the contact or terminal.
Sometimes it pulls out completely. Other times it only partially loosens, which can be even harder to see. A partially loose crimp can still make some electrical contact while becoming unreliable over time.
Broken or Damaged Strands
Over-crimping or using the wrong tool can damage the conductor strands. The wire may look attached, but the strands may be cut, crushed, or weakened inside the crimp barrel.
That can reduce current-carrying capability and make the termination more likely to fail under flexing or vibration.
Poor Fit Into the Connector Housing
A bad crimp can deform the contact. If the contact is bent, flattened, twisted, or oversized from improper tooling, it may not seat correctly into the connector housing.
That can lead to retention problems, poor mating, damaged contacts, or a connection that backs out when the connector is plugged in.
Heat and Long-Term Failure
A poor electrical connection can generate heat. Over time, heat can damage insulation, soften materials, increase resistance, and accelerate failure.
In power applications, this can become a serious reliability and safety concern.
The Crimp May Pass Today and Fail Later
This is one of the most important points.
A bad crimp does not always fail immediately.
It may pass a continuity test. It may power up the product. It may survive final inspection. It may even work for weeks or months.
Then the equipment gets shipped, installed, moved, vibrated, exposed to temperature changes, or placed under real load, and the weakness shows up.
That is when the small shortcut becomes expensive.
The Right Tool Is Part of the Connector System
In connector work, the tool is not separate from the product. The contact, wire, housing, seal, and crimp tool all work together as a system.
If the manufacturer specifies a certain tool, die, applicator, or crimp height, there is a reason for it.
The approved tooling is designed to produce the correct crimp shape and compression for that specific contact and wire range. Using a similar-looking tool, a generic crimper, or pliers may not produce the same result.
A contact can be high quality, the wire can be correct, and the connector can be properly selected — but if the crimp is wrong, the whole connection is at risk.
Things to Check Before Crimping
Before making a crimp, it is worth checking a few basic things:
Correct Contact
Make sure the contact or terminal is the correct part number for the connector housing and application.
Correct Wire Size
Verify that the wire gauge or metric wire size falls within the contact’s approved crimp range.
Correct Strip Length
Too much stripped wire can leave exposed conductor. Too little can prevent the conductor from reaching the proper crimp area.
Correct Tooling
Use the manufacturer-recommended crimp tool, die set, applicator, or approved equivalent.
Correct Crimp Location
The conductor crimp and insulation support need to be formed in the correct places. Crimping too far forward or too far back can create problems.
Proper Inspection
A finished crimp should be inspected for correct wire placement, conductor visibility, insulation position, contact damage, and overall shape.
For critical applications, pull testing, crimp height measurement, and documented process controls may also be required.
Good Crimps Look Boring
A good crimp usually does not look dramatic. It is neat, controlled, repeatable, and properly formed.
That is exactly the point.
Good crimps are not about squeezing as hard as possible. They are about using the right tool and creating the same reliable result over and over again.
In production, consistency matters. In field service, reliability matters. In both cases, guessing is not a good process.
The Cost Question
Using the right crimp tool can feel expensive, especially when the job only involves a small number of contacts.
That is understandable.
But the real cost is not just the price of the tool. The real cost is what happens if the connection fails later.
A bad crimp can lead to troubleshooting time, warranty claims, field service calls, customer dissatisfaction, product returns, downtime, or damage to the equipment.
Compared with that, the correct tool often looks a lot less expensive.
My Practical Take
My view is simple: if the crimp matters, the tooling matters.
For temporary bench testing or a quick mockup, people sometimes take shortcuts. But for anything that will be shipped, installed, sold, serviced, or relied on, the crimp should be made with the correct specified tooling.
Pliers are not a substitute for a real crimp tool.
A proper crimp gives you a better chance of getting the mechanical strength, electrical performance, and long-term reliability the connector was designed to provide.
It is not just about making the wire stay in the terminal. It is about making a connection that continues to work after the product leaves your hands.
Final Thought
Crimps are small, but they carry a lot of responsibility.
A good crimp can make a connector system reliable. A bad crimp can turn a good connector into a field failure.
The best practice is simple: use the correct contact, the correct wire, the correct strip length, and the correct manufacturer-specified tooling. Do not rely on pliers, guesswork, or “close enough.”
In connector and wiring work, small details matter. A good crimp is one of those details that can save time, money, and frustration later.
ConnectorGurus.com note: Always verify crimp tooling, wire range, strip length, crimp height, pull-force requirements, and inspection criteria against the specific connector or terminal manufacturer’s documentation and any applicable industry standards for your application.
